How Do You Know Incoming Mail Server
Mar x, 2022
Amanda B.
6min Read
How to Set up Outlook: Complete Tutorial
If yous are looking for an easy and effective style to organize your email accounts, consider using an e-mail customer such as Microsoft Outlook.
It'due south besides an excellent platform to manage your calendar, track tasks, and store contacts.
Calculation an e-mail account to Outlook may seem daunting for beginners. However, in that location's no need to worry – this tutorial volition testify you how to set upwards Outlook rapidly and hands.
Download Website Launch Checklist
Prerequisites
The requirements to configure Microsoft Outlook depend on the type of e-mail account you have.
If you want to gear up a custom electronic mail account on Microsoft Outlook, you lot need to have:
- An email address – create an email account with your purchased domain name by getting an email hosting plan. Your postal service accost will await similar admin@instance.com.
- An electronic mail password – you'll need it when configuring Microsoft Outlook.
- Business relationship configuration details – locate your IMAP, POP, and SMTP configuration details. Microsoft Outlook uses these incoming and outgoing server settings to send and call back letters from your email provider's server.
If you want to add a Gmail account to Outlook, y'all'll only need the electronic mail address and countersign. That'southward because Microsoft Outlook will automatically add your Gmail account using IMAP. The process should be similar if y'all use a like free e-mail provider.
If you have ii-factor authentication (2FA) enabled, brand sure you have your authentication app like Google Authenticator and its password set up.
Finding the IMAP, POP, and SMTP Configuration
Before adding the incoming and approachable post server details to an electronic mail client, you lot'll demand to find your email configuration details.
The steps to access your email configuration information depend on your email hosting provider.
If you use a Hostinger email, log into your hosting account, go to hPanel, and ringlet downwardly to the Emails section. Then, click on Electronic mail Accounts.
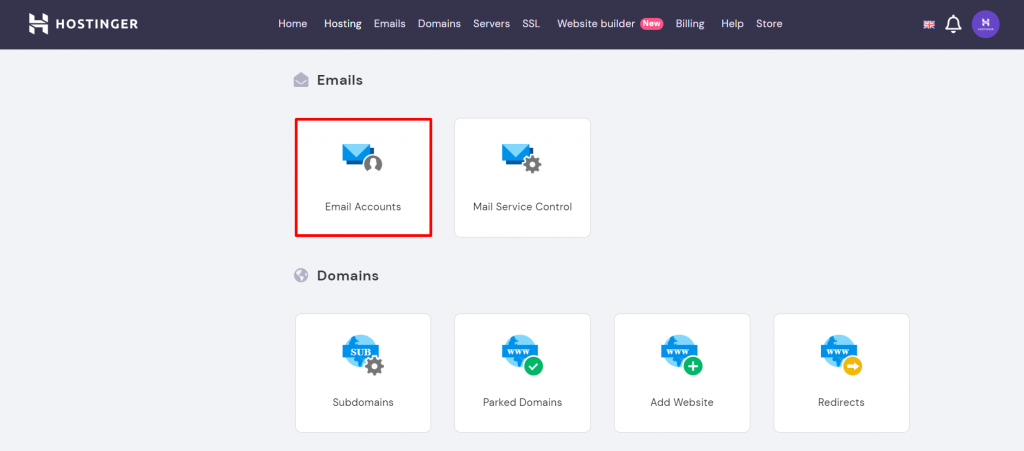
Click on your domain proper name and navigate to Configuration Settings -> Manual Configuration to see the mail protocol data.
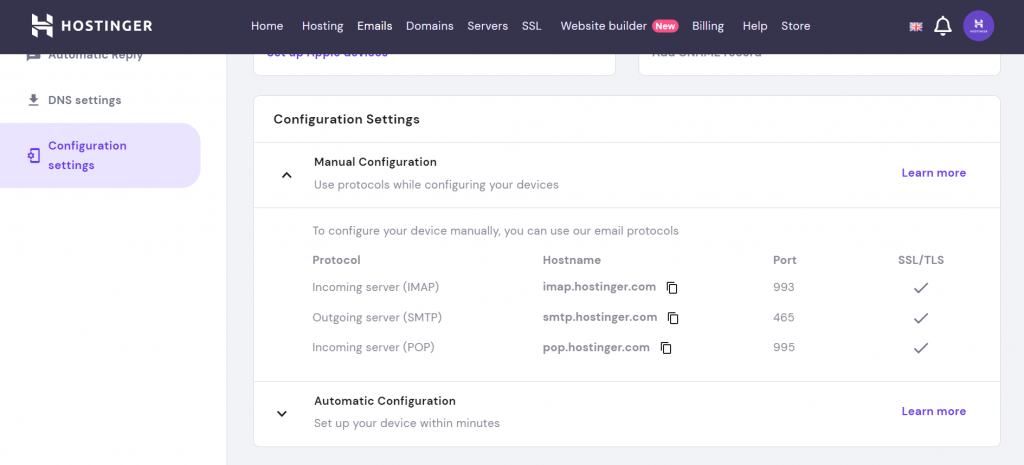
Copy and paste the details to a Notepad file for safekeeping, or leave the folio open while you configure Microsoft Outlook.
How to Fix Outlook
After collecting the necessary details, it's time to gear up Outlook.
Microsoft Outlook comes in dissimilar versions. Nosotros're going to discuss setting up Outlook 2019 and 2016. It's of import to know which y'all are using since the configuration process is slightly different for each version.
The steps to configure Outlook on both Windows and macOS are very similar. This tutorial will focus on setting upward the Windows version of the program.
Editor'southward Note
Want to manually add your Hostinger e-mail address to Outlook? Information technology's like shooting fish in a barrel and quick – merely grab your IMAP and SMTP configuration details from hPanel. And then, open the mail service client and add together a new email business relationship. Enter the details into their respective fields. If yous come across whatsoever errors, reset your password and input the parameters one more time. For more than information, follow the tutorial below.

Microsoft Outlook 2019
This department will teach you how to add an electronic mail address to Outlook 2019.
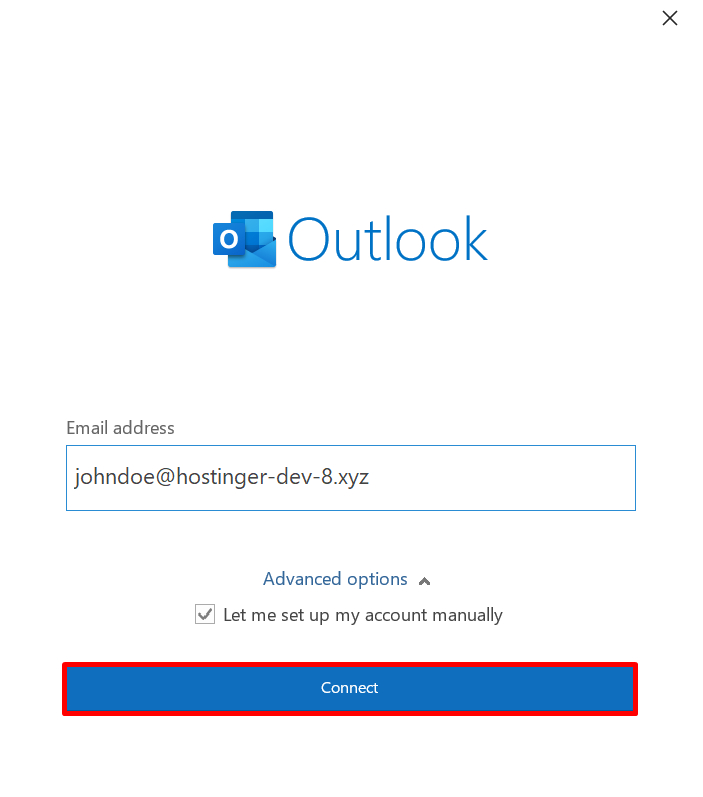
1. Open Microsoft Outlook 2019
When the window pops upwardly, enter your full email accost.
To configure the approachable and incoming mail server settings, click Advanced options, select the Let me fix upwardly my account manually box, and click Connect.
2. Configure Your IMAP or Popular Settings
On the Avant-garde setup panel, y'all'll exist asked to pick your business relationship type.
Choose between POP or IMAP. If you use more than than one device to access the electronic mail business relationship, nosotros recommend selecting IMAP.

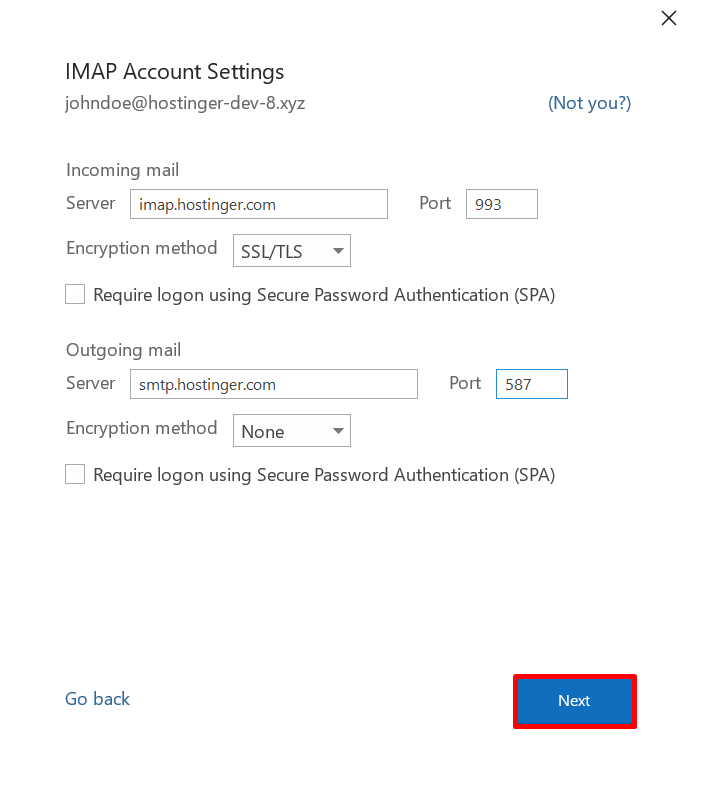
On the IMAP Account Settings page, fill in the Incoming mail service and Outgoing mail fields with the hostnames and port numbers of your mail service servers. Then, cull SSL/TLS as the Encryption method for incoming mail and click Next.
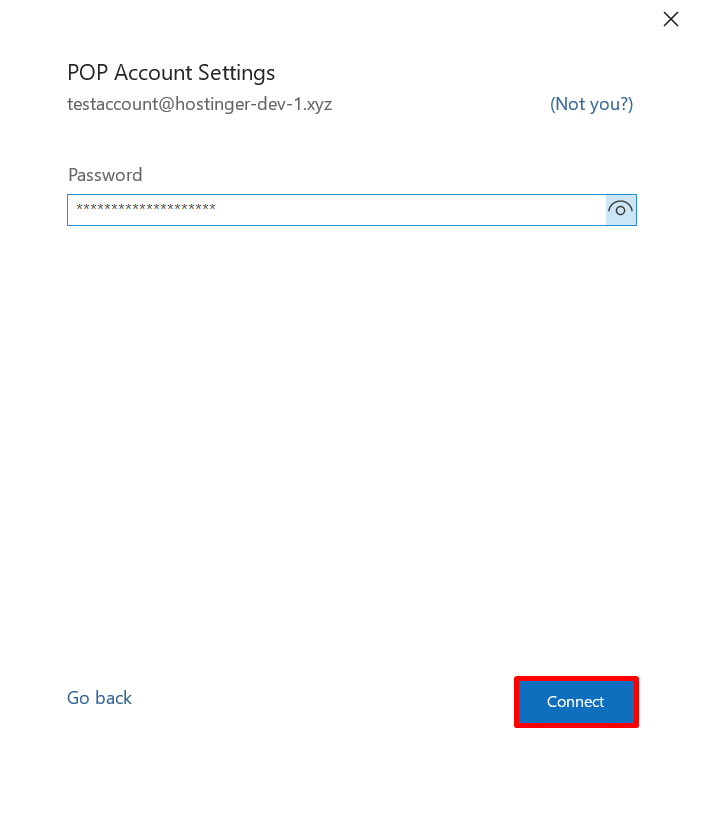
3. Finalize Your Setup
Enter the countersign for your e-mail, click Connect, and wait for the process to finish.
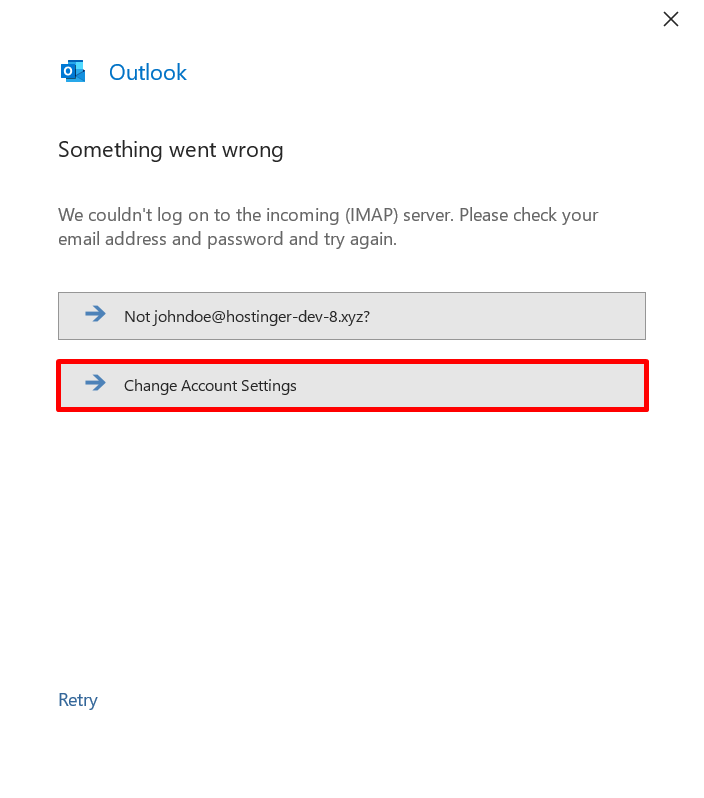
If an error message appears, click on Change Account Settings to go dorsum to the previous screen. In one case there, double-check the settings.
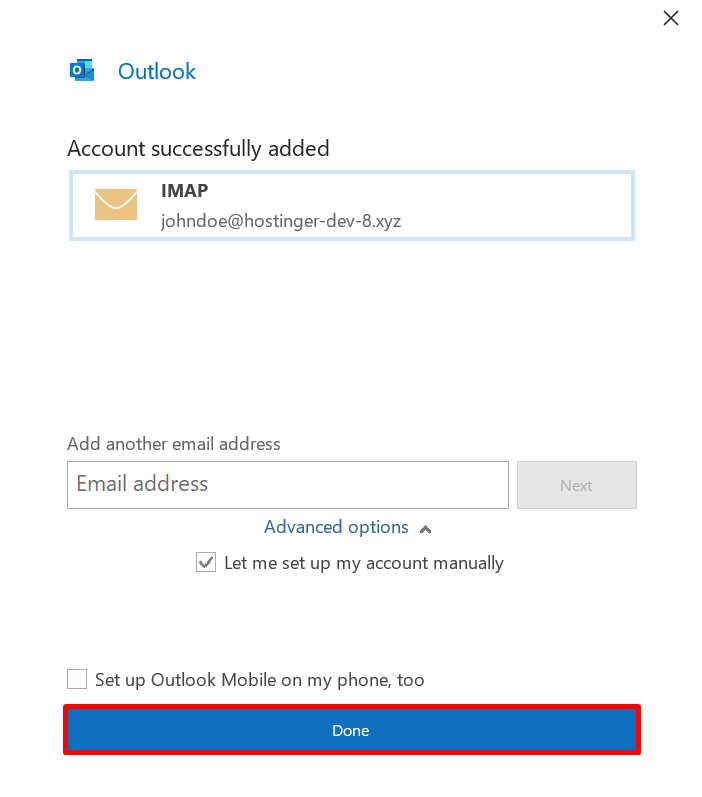
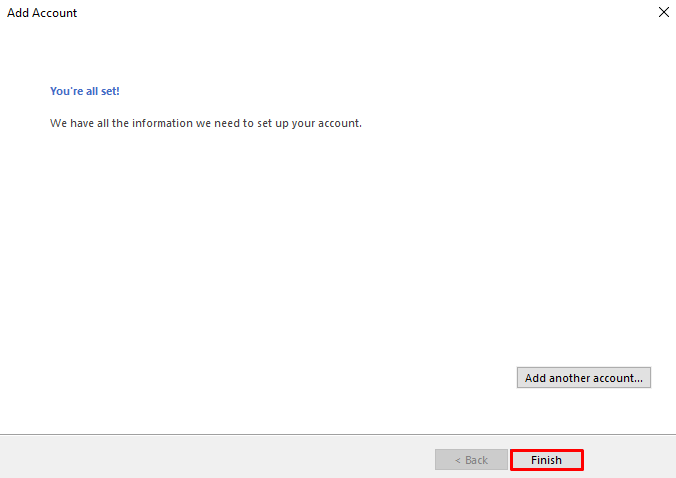
If the information yous entered is correct, the window below volition open to permit you lot know that the email account was added successfully. Click Done to view your mailbox.
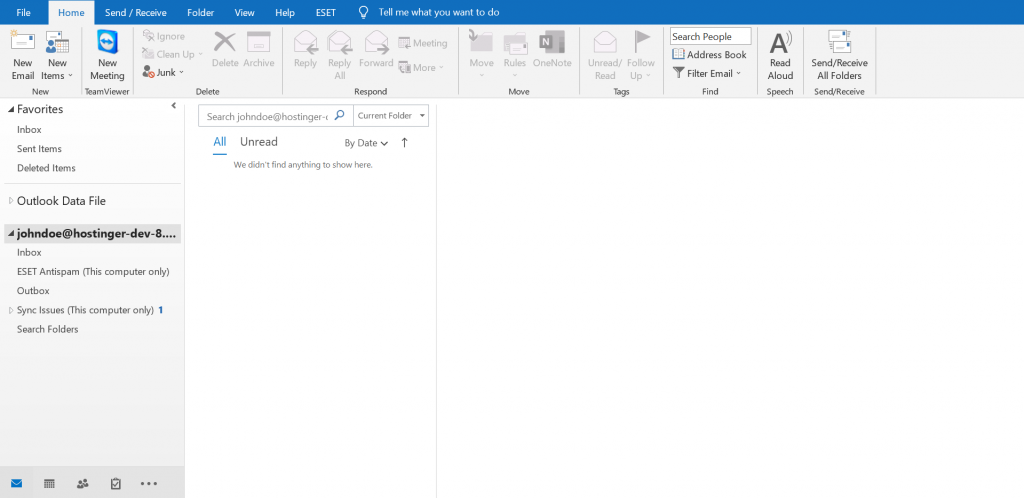
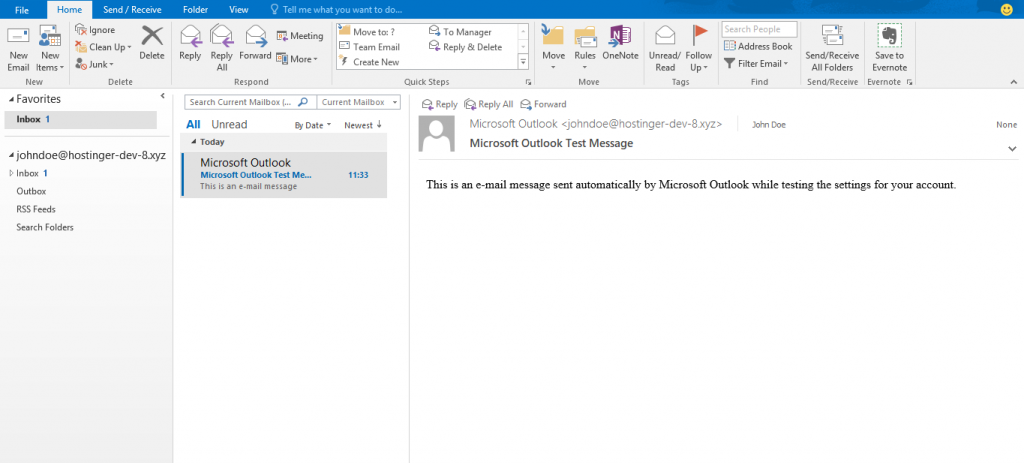
Now, yous tin can starting time using Outlook to ship and receive emails. Here's what the interface looks like:
To add boosted e-mail accounts, become to File and click Add business relationship. Then, follow the same steps as before.
Editor'southward Note
To ready an Outlook inbox for a Hostinger email address automatically, you'll demand an email address, the right MX records set up, and for your domain to bespeak to our servers. Add together the following CNAME record to the DNS zone of your domain:
- Proper noun (Host) – autodiscover.domain.tld. Change domain.tld with your domain name.
- Target (Pointing to) – autodiscover.mail.hostinger.com.
- TTL – 900.
Go along in mind that information technology may take upwardly to 24 hours for whatever DNS tape changes to propagate. Once that'south washed, open up Outlook and add together a new email account. Enter your username and countersign. It should take up to ten minutes for the mail service client to be successfully linked to your Hostinger mailbox.
Microsoft Outlook 2016
To configure Microsoft Outlook 2016, follow the guide below.
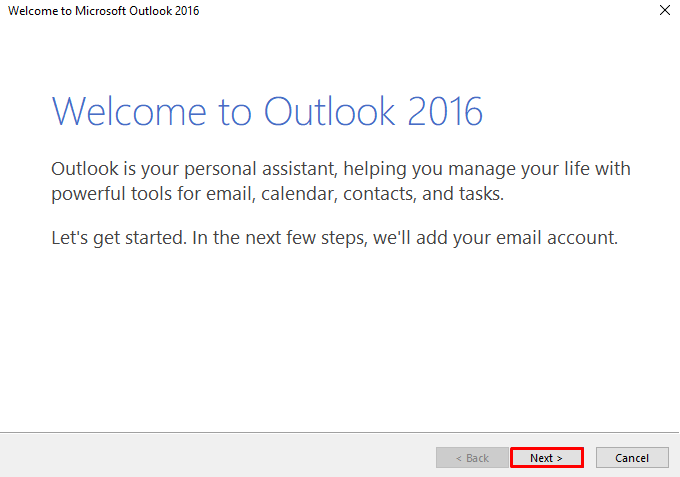
ane. Open up Microsoft Outlook 2016
After opening the programme for the first fourth dimension, a welcome screen will pop up. Click Next to go along with the setup.
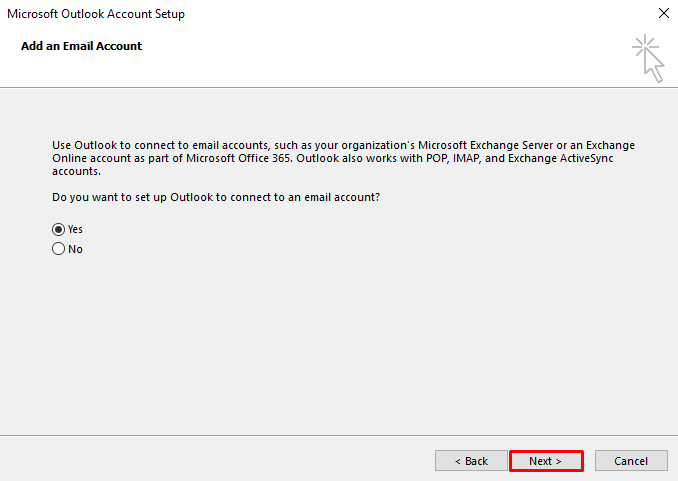
And then, tick Yes and click Next once once more.
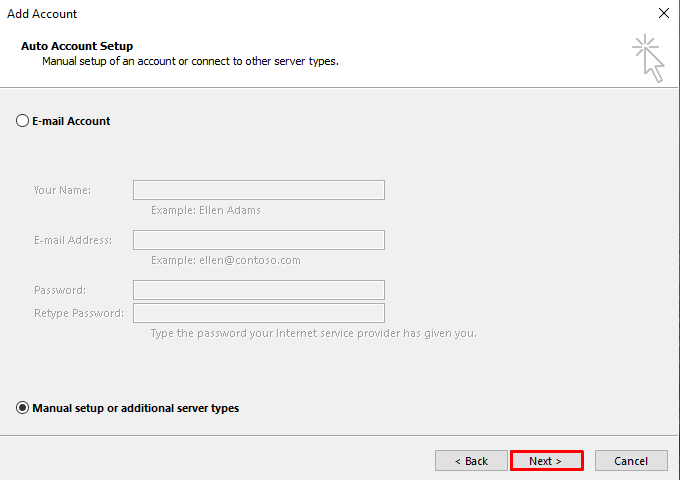
On the Add Account page, choose the option Manual setup or boosted server types and select Next.
2. Configure the POP or IMAP and SMTP servers
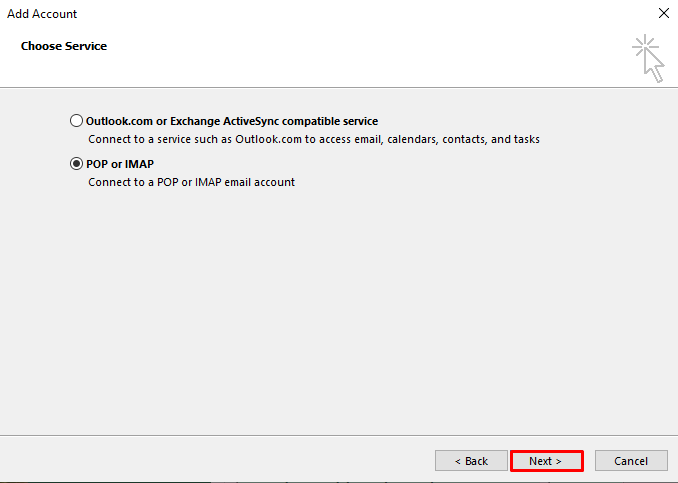
Choose Pop or IMAP and click Next to continue.
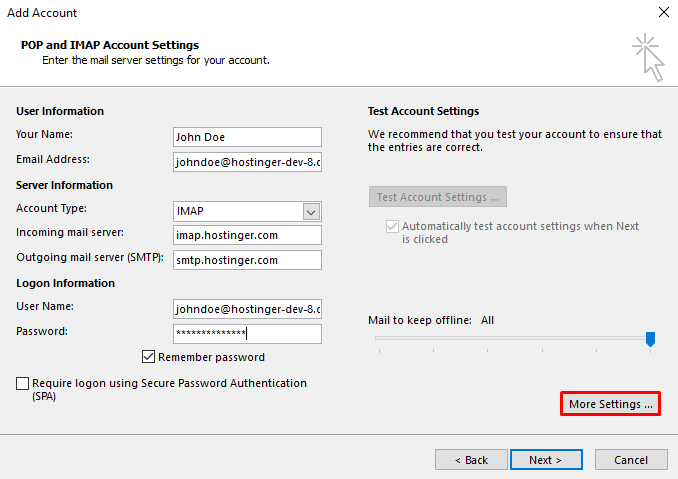
On the Pop and IMAP Account Settings page, enter your name and total email address.
Under Server Information, click on the Business relationship Blazon drop-downwards menu and choose Pop or IMAP – nosotros will select IMAP in this step.
Fill in both Incoming mail service server and Outgoing mail service server (SMTP) fields with the postal service server hostnames.
Then, enter your email address once again in the User Proper noun field along with the password, and click on the More than Settings button.
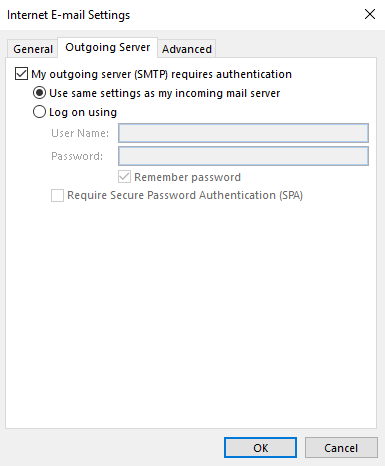
On the next popup window, click on the Approachable Server tab. Tick My outgoing server (SMTP) requires authentication and select Utilize same settings as my incoming mail server.
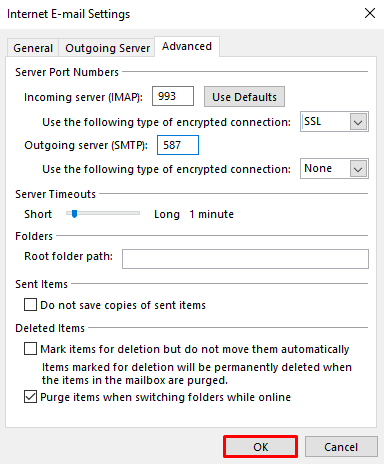
So, click on the Avant-garde tab. Type your port numbers in the Incoming server (IMAP) and Outgoing server (SMTP) fields.
Under Incoming server (IMAP), click on the Utilize the following type of encrypted connection drop-down card and cull the SSL encryption. Click OK.
In one case you're back on the Add together Business relationship page, click Next to proceed.
three. Finalizing the Setup
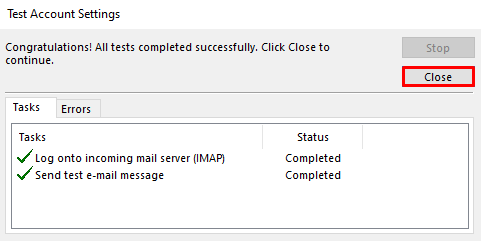
Outlook volition try to connect to your incoming mail server and verify the settings.
It will display a message similar to the 1 below if it succeeds. Click Shut to proceed.
Another window saying that the setup procedure has finished will appear. Click Cease.
Now, you tin start using your e-mail account. Here's what the Microsoft Outlook 2016 interface looks like:
To add boosted email accounts to Outlook 2016, simply go to File -> Add together business relationship.
IMAP vs POP
IMAP and POP are mail service protocols that an email client uses to admission messages from electronic mail servers.
Internet Bulletin Access Protocol (IMAP) makes it possible for email clients to sync with a postal service server in real-time, allowing users to access their email on multiple devices.
When using this protocol, Outlook volition only download a bulletin after you click on information technology. It won't download any attachments automatically.
On the other mitt, Post Office Protocol (POP) downloads and stores messages locally but deletes them from the server'south inbox. This means that the inbox can be accessed on simply one device.
The upside to Popular is that users can still access their mail even if there is no connexion to the server.
If y'all're unsure of which e-mail protocol to use, nosotros recommend IMAP since it will allow you to access the email on multiple devices.
Alternatively, if you want to complimentary up space on your server and view mail service offline, choose Pop.
Conclusion
The process to set up Outlook is straightforward and only takes a few minutes.
Before configuring Microsoft Outlook, retrieve to set an email address, countersign, and email protocol configuration details.
Let'southward recap the primary steps to set up Outlook, regardless of the version you use:
- Open Microsoft Outlook – admission the Outlook app and choose to fix the mail account manually.
- Configure the POP or IMAP and SMTP servers – choose the type of your mail account and input the incoming and outgoing mail server data.
- Finalize your setup – wait for Outlook to sync your mail. If an error message pops up, go back to the settings and check the configuration details you entered.
When choosing between IMAP and Popular, consider going with the former as it lets you lot access your email account on different devices.
We hope this article has helped you ready a postal service account on Microsoft Outlook. If you have whatsoever questions or suggestions, feel free to share them in the comments section.

Amanda is a Content Writer at Hostinger with an extensive passion for WordPress and digital marketing. She aims to produce content that can help readers further their businesses and careers. In her free time, she loves hiking, reading books, and filling her bullet journal.
Source: https://www.hostinger.com/tutorials/how-to-set-up-outlook
0 Response to "How Do You Know Incoming Mail Server"
Post a Comment